DataTools data migration picklist mapping allows you to map any number of inputs to a finite number of supported Salesforce picklist values. Typically your source object will not map perfectly 1-1 into Salesforce so mapping and migrating salesforce picklists requires its own special mapping area.
Mapping Salesforce Picklists Values:
1. From the Migration tab, Click on an object name to navigate to the field migration detail fields
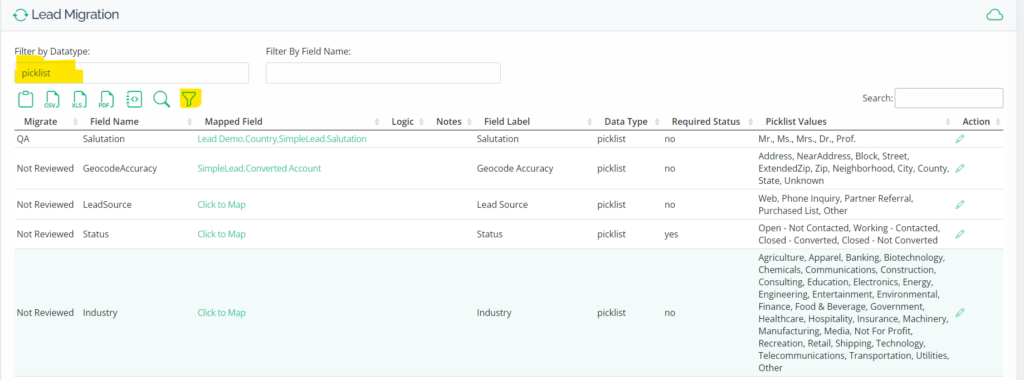
2. To view all picklist values in your Salesforce object instance, click the filter icon and then select “picklist” as an option. This will narrow down the list of fields only to picklists.
3. Select “Click to Map”

4. In the data mapping sidebar, select the source object where you will obtain your source picklist values. Learn to setup a source object and fields.
5. Select the primary that you will obtain the picklist values.

PRO TIP: Sometimes mapping picklist values from a source system to Salesforce requires data from multiple fields. For more complex use cases we recommend choosing the source object and adding notes / logic for your ETL development.
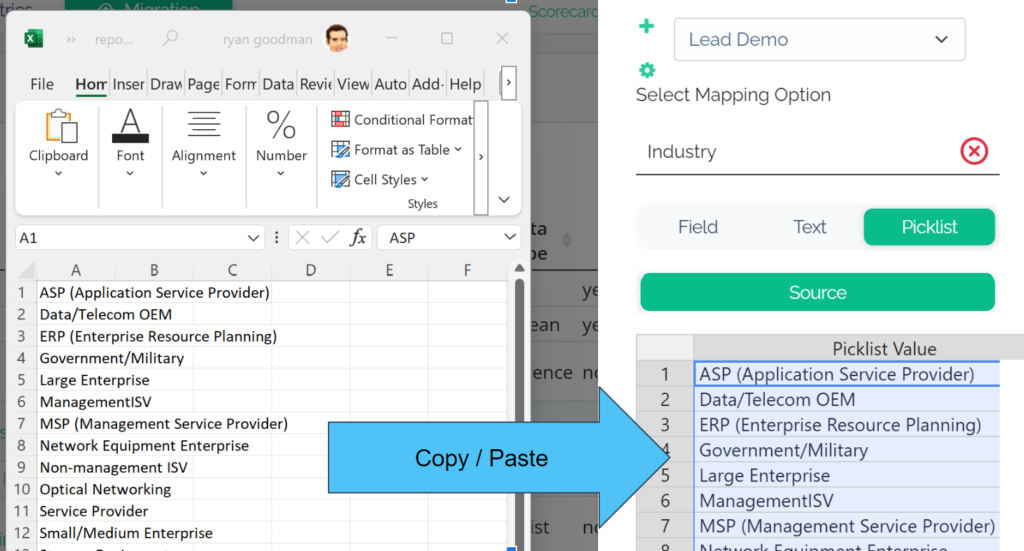
6. Select “Picklist”

7. Copy and paste picklist values into the DataTools Pro property sheet.
PRO TIP: To ensure nothing is missed, we recommend mining your source database to fetch all distinct values that could be migrated and entering them into the data mapping tool.

8. Click “Mapping” – DataTools Pro will generate 1 mapping row for every source picklist value. You will then map each individual Salesforce picklist value that is related to the source. This is extremely important to ensure you can explicitly define every available value that can come from your source system.
