In this tutorial we will configure Azure Data Factory for Salesforce using the new connector configuration released in January 2024.
In January 2024, Azure DataFactory updated their linked service integration to use connected application authentication, replacing the legacy user / password authentication mechanism. Unfortunately, while doing so the DataFactory team left a huge documentation hole. We figured out the correct configuration settings so Azure and Salesforce teams have a single, common document to work from here.
Configure a Salesforce Connected App in Salesforce
Unlike the now deprecated Salesforce linked service configuration setup. , your Salesforce administrator will need to create an Azure connected application before you can securely connect and use Salesforce with Azure DataFactory.
1. Login to Salesforce go to Settings

2. Open the Salesforce App Manager

3. Click “New Connected App”

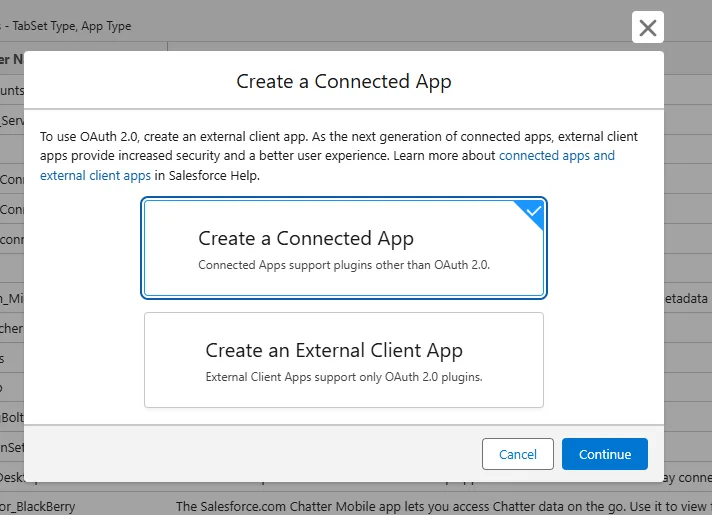
4. Select Create a Connected App

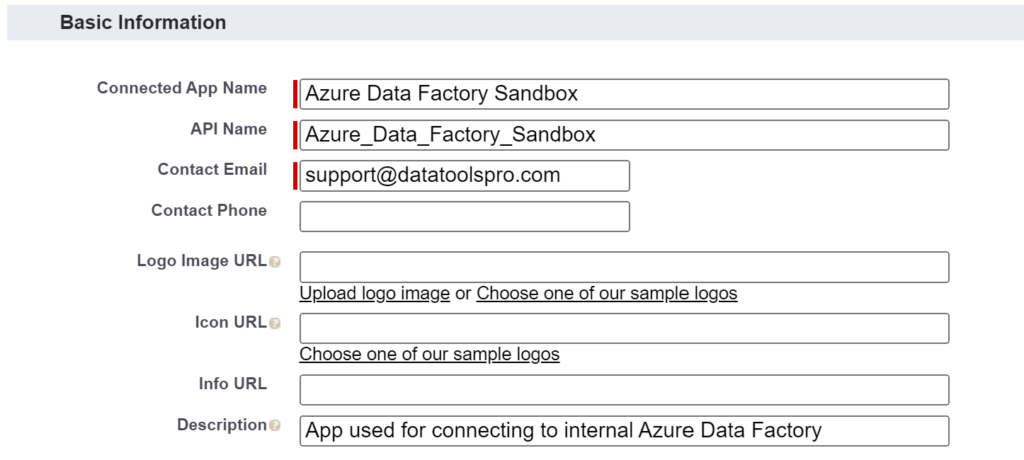
5. Fill in the Basic Information required fields.
We recommend naming the connected App “Azure Data Factory” with a designation of the environment. For example, in this tutorial we are connecting to a Sandbox instance of Salesforce. Because you will need a separate linked service per salesforce instance, it helps to provide the name of the sandbox. For your production Salesforce org, we recommend including “Production” in the connected app name.

6. Check “Enable OAuth Settings.

6. Set Callback URLs:
https://adf.azure.com/
https://*.azure.com
7. Set Selected OAuth Scopes to the following 2 scopes:
Full access (full)
Perform requests at any time (refresh_token, offline_access)
8. Leave “Require Secret for Web Server Flow” and “Require Secret for Refresh Token Flow” checked.
9. Check “Enable Client Credential Flow and confirm the alert. This indicates that when you generate a consumer key and secret, it is critical that only the administrator hold the consumer key and secret.

This option is required to run Azure DataFactory for Salesforce. This credential flow effectively sets a specific salesforce user to execute moving data in and out of Salesforce through data factory. This user can be an API / Integration User (recommendation) or a Salesforce user. We will configure this user in this tutorial in a few steps.
9. Click “Save”. There are a number of other features for connected apps that will not apply for Azure Data Factory, as Connected Apps cover a wide range of application functions. You can leave everything else unchecked / filled.
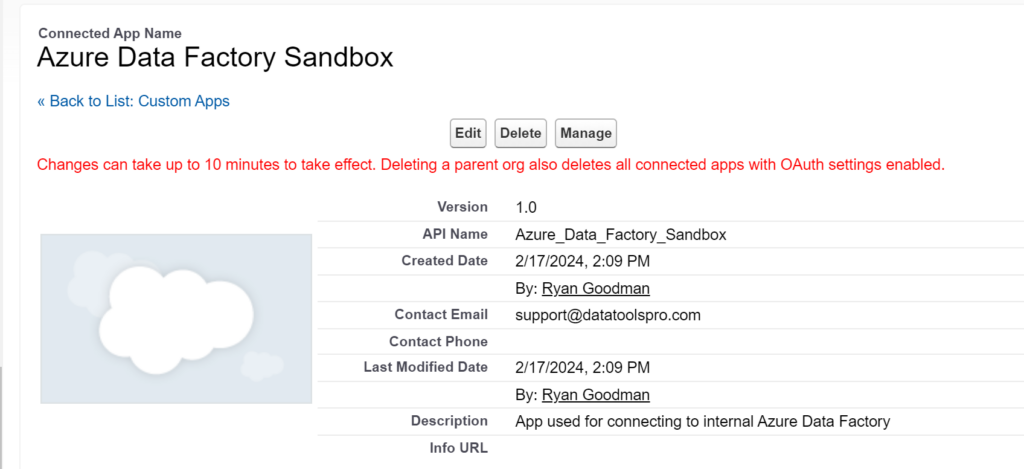
Result: Connected App is Created
Your Connected App is now created but there are more steps required before you can successfully use your connected App in Azure DataFactory.

10. Click Manage button located at the top of the Connected App page.
Additionally, from the Connected App screen you will now see a record. You can click the “V” button and click Manage

11. Click Edit Policies button located at top of screen
12. Navigate to “Client Credentials Flow.
13. Set the “Run As” user.
Note: If you are working in a personal sandbox with only 1 active user, you may want to create an Integration User in the event no users appear when you attempt to add a “Run As” user. We also recommend using an API Integration user to ensure as individuals leave your organization you do not accidentally break your data pipelines in Azure DataFactory.

14. Click Save
No other settings on this page need to be modified to proceed obtaining your keys and setting up Azure
Your Salesforce Connected App is complete and ready to be connected to Azure DataFactory!
Notes on IP Restrictions and Whitelisting ADF
As part of our documentation we cannot advise to modify your IP restrictions and handling. We recommend proceeding with the enforce IP restrictions checked and test end to end. If you get an error that access is blocked because access / IP restrictions you can view our whitelist notes below
Obtain Salesforce Connected App Keys for Azure DataFactory
1. In Salesforce, navigate to Settings and find App Manager.
2. Click on App Manager

3. Locate your Connected app for Azure Data Factory and clock on the “V” button and click View

Under “API” section click the Manage Consumer Details button

Copy and secure your consumer key and consumer secret and keep them in a secured location. We recommend Azure Key Vault or at minimum copy and pasting these items into any key vault tool The consumer key an consumer secret are required to configure your Azure data factory linked service.

Next, you can configure and test your Azure Data Factory Linked service!
Setup Azure Data Factory for Salesforce Linked Service
1. Open Azure Data Factory
2. On the left navigation pane, navigate to “Linked Services”

2. Click the + New button
3. Select Salesforce

3. Select Salesforce
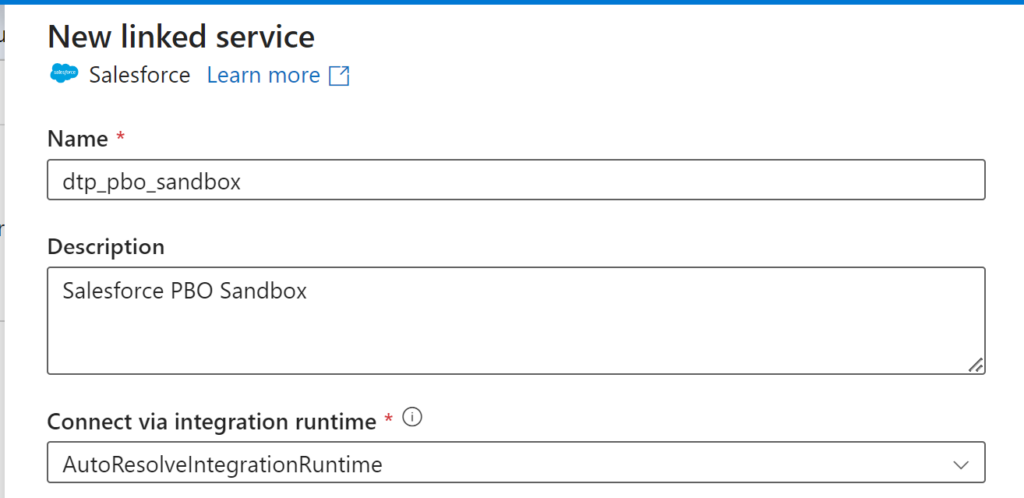
4. Fill in name and description. Make sure the Name itself is descriptive of the environment you are connecting to. This is important because all Data Factory users will require context to what instance of Salesforce they are connecting to.
In this example we are connecting to a Sandbox as shown below:

5. Fill in the login domain name for your salesforce organization. You will include “https://”
Sandbox Format
https://MyDomainName--SandboxName.sandbox.my.salesforce.comProduction Format
https://MyDomainName.my.salesforce.com
6. Set the Authentication type to Oauth 2.0 Client Credential
At the time of this tutorial, this is the only available option for Azure DataFactory.
7. Enter your consumer key and secret from Salesforce into the Client ID and Client Secret fields
Consumer Key from Salesforce goes into Client ID.
Consumer Secret from Salesforce goes into Client Secret

8. Enter the API version as “54.0” or higher

9. Click “Test Connection” located at the bottom of the window

If you followed the steps in this article you should see a success, but there are of course a number of potential issues that you can experience. We highly recommend tracing the steps highlighted in our Salesforce Connected App instructions at the start of this tutorial.
If you hit any errors or issues, feel free to share with us to add to this page. ! We would love to keep a log of common issues and solutions to help other folks like yourself who have found this article. ryan@datatoolspro.com
Notes on Whitelisting Azure DataFactory

In your Salesforce org, if you have locked down your org to restrict IP addresses that you could face some challenges connecting. Azure DataFactory has documented IP addresses that are used to connect. We provide the link and sampling of IPs in our whitelist documentation that you may need to provide to your Salesforce admin / network and network security should there be IP restrictions that block usage of ADF.
ownload IP address listings by service tag from Microsoft Download Page
You will need to open this file in notepad and search for “DataFactory” and the Availability Zone location
Example Azure Availability Zone. I am showing US East 2 IP addresses.

Resulting IP addresses should be formatted as a comma separated list like the following. Because Snowflake is deployed in USWest2 and USEast2, I have pulled the IP addresses as of 1-1-2025.
US-EAST2 – DataFactory.EastUS2
20.41.2.0/23, 20.41.4.0/26, 20.44.17.80/28, 20.49.102.16/29, 20.98.195.172/32, 20.98.198.224/29, 40.70.148.160/28, 40.84.85.144/28, 40.84.85.192/28, 52.167.107.224/28, 172.210.218.144/28US-WEST2 – DataFactory.WestUS2
4.154.144.64/29, 13.66.143.128/28, 20.42.129.64/26, 20.42.132.0/23, 20.125.4.170/31, 20.125.5.248/29, 40.64.132.232/29, 40.78.245.16/28, 40.78.251.192/28, 172.179.209.16/28, 172.179.209.32/29As you notice the IP addresses are inclusive of the digits after the “/” which is called CIDR notation.
