Salesforce data pipelines to Snowflake free template
1. Create Data Connections
Connect Azure Data Factory to Salesforce.com (New 2024)
Connect Azure Data Factory to Snowflake
2. Create Data Sources
Create a Snowflake Data Source in Azure Data Factory
Connect to Salesforce Lead and Account Object with Azure ADF
3. Move Data Between Applications
Create a Data Pipeline to Connect Salesforce to Snowflake
4. Publishing and Administration
Create a basic ADF Data Pipeline Connecting Salesforce to Snowflake
IIn this example, we will provide you with a comprehensive guide on how to create ADF data pipeline connecting Salesforce to Snowflake. By following this tutorial, you’ll be able to combine all the previously created data sets and connections, allowing you to extract data from your Salesforce.com source and push it directly into a Snowflake table sink. This powerful and intuitive process streamlines your workflow, enabling you to efficiently manage your data and maximize your overall data management capabilities. So, let’s dive right in and explore the step-by-step process of creating an ADF data pipeline that connects Salesforce to Snowflake.
By following this step-by-step guide, you’ll be able to build an test and end to end pipeline from Salesforce leads to a Snowflake leads table.
Ready to automate the setup process for multiple objects?
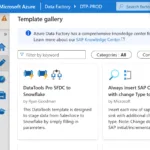
To save up to 90% of the time and enable a meta-data based data pipeline, we have built our free Salesforce to Snowflake template. Get the Azure ADF template for free!
Related Tutorials:
To complete and follow along in this tutorial you will need to have previously created datasets in Azure Data Factory:
Additional Documentation from Microsoft:
Copy data from and to Salesforce using Azure Data Factory
Copy and transform data in Snowflake using Azure Data Factory


