We have created a getting-started tutorial to ensure you set up Datameer for success quickly and easily. After following the steps in this guide, you can immediately start building business-ready data assets!
Snowflake Setup – Datameer Role and Data
Before setting up Datameer, you will need to prepare a Snowflake role/security configuration. We highly recommend creating a role specifically for Datameer because of its elevated permissions to read and create a number of Snowflake assets.
The fastest path is to implement the necessary roles and assets is simply copy the SQL code from Github.
https://github.com/DataToolsPro/datameer_seeding/blob/main/SETUP_DATAMEER.SQLModify step 8 and 9 based on your Snowflake configuration
-- STEP 8: Grant usage on warehouse
GRANT USAGE ON WAREHOUSE <YOUR WAREHOUSE> TO ROLE SERVICE_DATAMEER;

-- STEP 9: Optional - Grant the role to a user (uncomment and modify as needed)
-- GRANT ROLE SERVICE_DATAMEER TO USER <<YOUR USER>>;
Set up Service User for Datameer
There are multiple configurations for Datameer end-user logins. If you decide to implement a service user there are multiple approaches.
USE ROLE ACCOUNTADMIN;

CREATE USER SERVICE_DATAMEER
  TYPE = SERVICE
  ROLE = SERVICE_DATAMEER
  DEFAULT_ROLE = SERVICE_DATAMEER;
Datameer Proof of Value / Evaluation – PAT
If you are evaluating Datameer as a trial or proof of value as an individual user, we recommend a PAT (personal access token), which is intended for temporary use. In Snowflake, go to your user settings, click “Authentication” and then add a new token (see screenshot below)
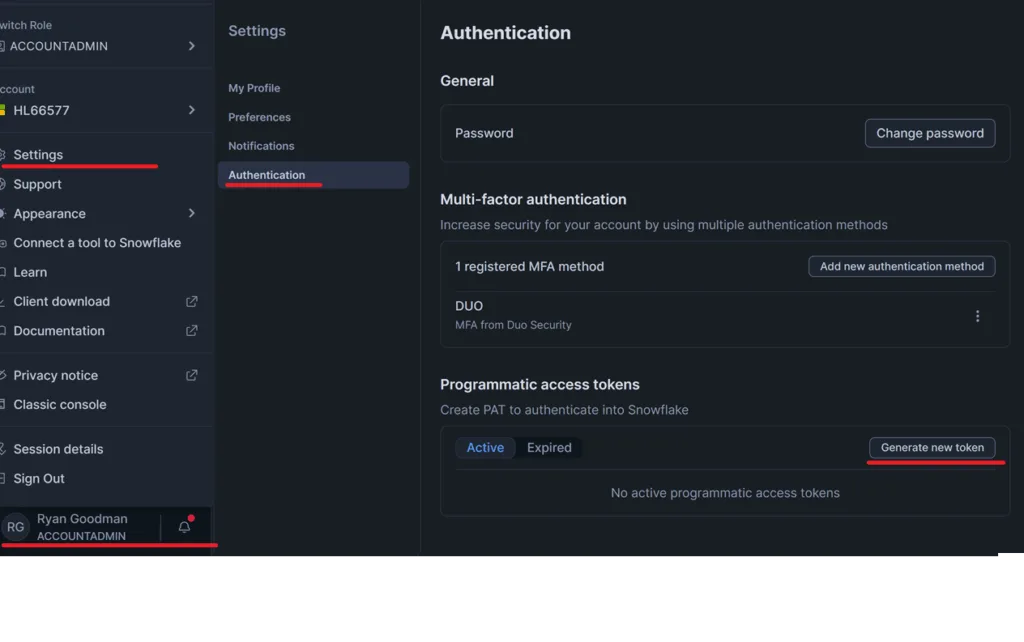
Set up your PAT for Datameer. Set the expiration for 15 or 30 days, depending on your proof of value timeline. Set the role to SERVICE_DATAMEER
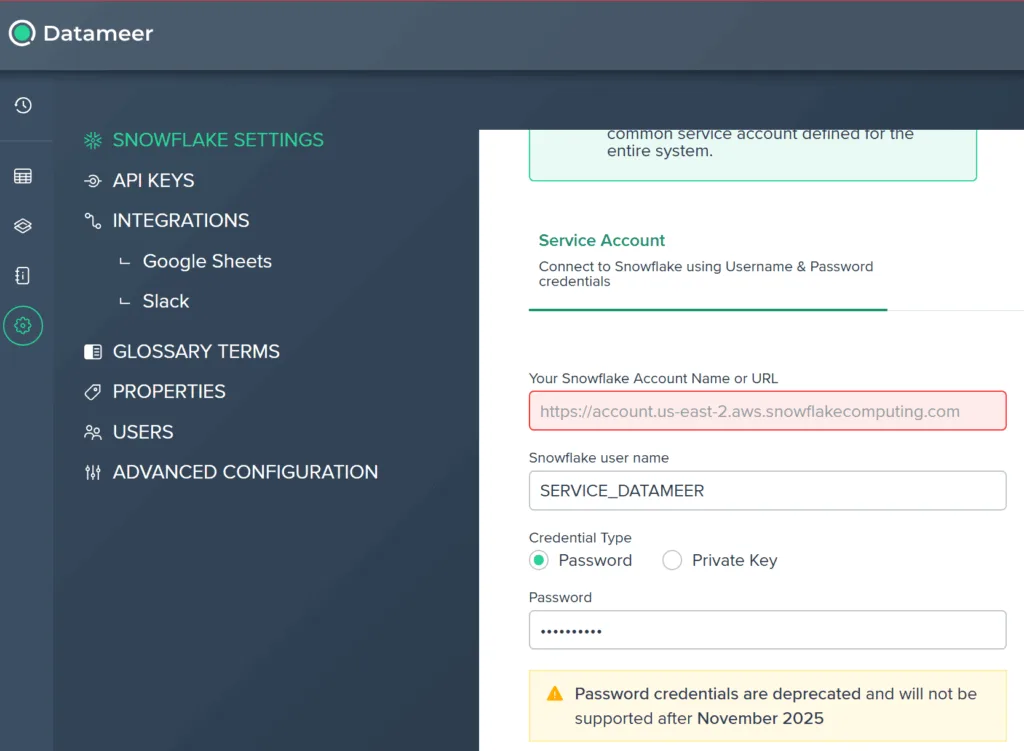
Configure Datameer for Access Token Authentication
In Datameer settings, enter your personal access token into the “Password” field. Do not enter a user password. We recommend this approach only for temporary scenarios like proof of value/trial.
Datameer Service User – PRODUCTION
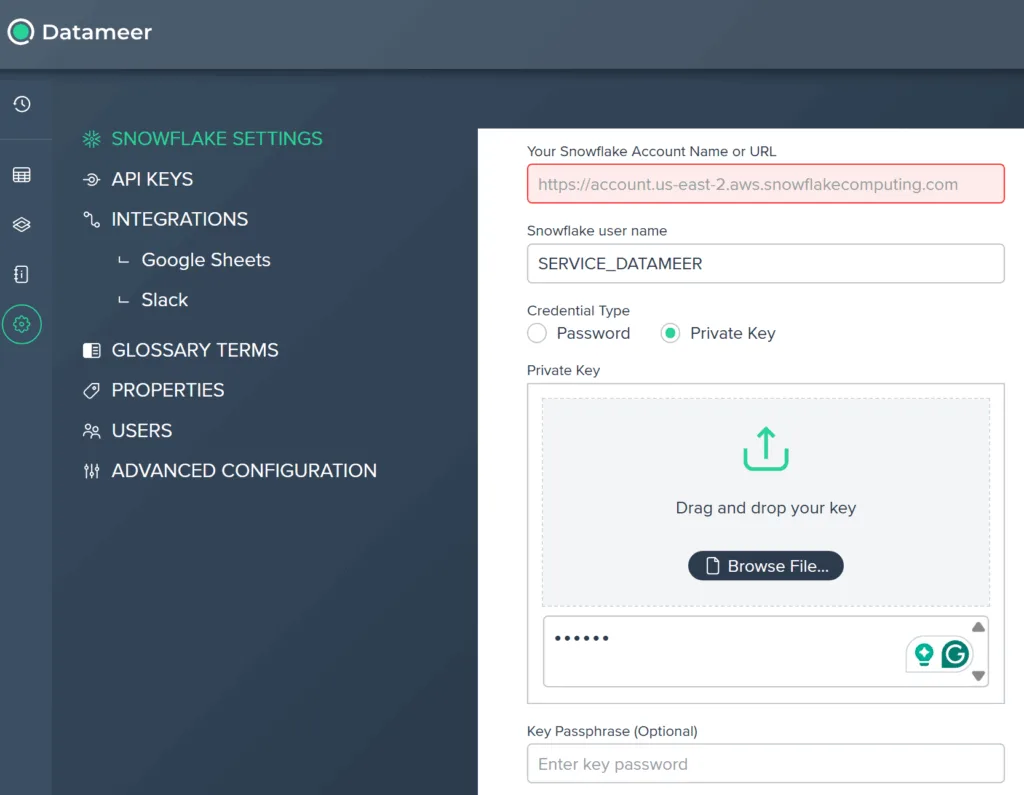
The production configuration for Datameer with a service user should require a Private Key configuration. You should not use a Username / PW or personal access token for a production service user:
Learn how to generate Snowflake keypair authentication
When you complete these steps, you need to apply the public key to the SERVICE_DATAMEER user.
ALTER USER SERVICE_DATAMEER SET RSA_PUBLIC_KEY=
  '-----BEGIN PUBLIC KEY-----
<<YOUR PUBLIC KEY>>
-----END PUBLIC KEY-----';

DESC USER SERVICE_DATAMEER;
With your private key acquired, import or paste the key and passphrase.
Whitelist Datameer
To allow access from Datameer to your Snowflake instance, you need to add a Datameer network rule that allows communication between Datameer and your Snowflake instance.

That’s it! Let’s start building analytics